Easy No-Bake Granola Bars
Need an easy homemade granola bar recipe you can customize with pantry staples? Make this recipe for no-bake bars that come together in minutes and travel perfectly.
Tips Before Making Your No-Bake Granola Bars
Pick the Right Binder to Hold Everything Together
The backbone of any good no-bake bar is a sticky binder that clings to rolled oats and mix-ins without making the finished squares overly soft. A generous scoop of peanut butter or almond butter blended with warmed maple syrup creates just the right texture, helping the bars hold together once chilled. Fold in add-ins like dried fruits or mini chocolate chips only after the nut-butter base is evenly coated, so every bite has balanced flavour and structure.
Press the Mixture Firmly for Bars That Won’t Crumble
After tipping the oat mixture into the pan, line your dish with parchment paper and use the paper’s overhang to press the bars together as tightly as possible. Compacting firmly (a flat-bottomed measuring cup works well) removes air pockets and locks the ingredients in place, ensuring neat slices later.
Allow Enough Chill Time for a Clean, Even Slice
Once the pan is packed, cover it with plastic wrap and refrigerate. Two hours is usually enough, but overnight is ideal for bars that hold their shape outside the fridge. Let the slab sit at room temperature for a minute or two before cutting—this slight tempering keeps the edges from cracking while still giving you crisp, tidy pieces ready for snacking or on-the-go breakfasts.
Easy No Bake Granola Bars
Preparation time: 10 minutes
Chill time: 2 hours (hands-off)
Servings: 10 bars
Ingredients
2 cups rolled oats
½ cup peanut butter (or almond butter)
⅓ cup maple syrup
¼ cup mini chocolate chips (plus extra for topping, optional)
¼ cup chopped dried fruits (cranberries, apricots, or raisins)
1 teaspoon vanilla extract
Pinch of salt (optional)
Yogurt dip options (mix & match)
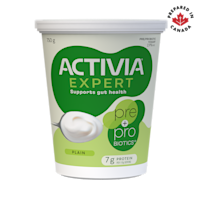
½ Activia Probiotic and Prebiotic Plain yogurt, chilled, for dipping
1–2 teaspoons maple syrup or honey
Pinch of ground cinnamon or cocoa powder
Handful of fresh berries or finely diced fruit
Directions
1. Prep the pan : Line an 8 × 8-inch square pan with parchment paper, leaving an overhang on two sides for easy lifting.
2. Warm the binder : In a small saucepan set over low heat, or in a microwave-safe bowl, gently warm the peanut butter and maple syrup just until the mixture loosens and blends smoothly. Stir in vanilla and salt. Remove from heat.
3. Combine dry ingredients : In a large bowl, add the rolled oats, mini chocolate chips, and dried fruits. Pour the warm peanut-butter mixture over top and stir until every oat is coated.
4. Pack it tight : Transfer the oat mixture into the pan. Fold the parchment over the surface, then press the bars together firmly with your hands or the bottom of a measuring cup, making sure the layer is compact and even. Sprinkle extra chocolate chips on top and press them in, if desired.
5. Chill and set : Cover with plastic wrap and refrigerate for at least 2 hours, or overnight for firmer bars that slice cleanly.
6. Slice and store : Lift the chilled slab out of the pan using the parchment overhang. Cut into 10 equal bars. Enjoy right away, or store leftover bars in an airtight container in the fridge for up to one week. These bars hold together best when kept cool.
7. Serve with a yogurt twist : Stir Activia Plain yogurt with maple syrup (or honey) and a pinch of cinnamon. Top with fresh berries just before serving, then dip or spread over each bar for an easy-and-delicious flavour contrast.
Questions Related to the Easy No Bake Granola Bars
How Should I Store Homemade No-Bake Granola Bars?
Once you slice the bars into neat rectangles, let them firm up for a few extra minutes, so the bars stick together. For grab-and-go convenience, wrap individual bars in plastic wrap or parchment, then place them in an airtight container. They keep well in the fridge for up to a week, and stay pleasantly chewy even at room temperature for a busy afternoon snack or quick breakfast bars on the run.
How Can I Customize These Bars for a Nut-Free Option?
It’s simple to make no bake granola bars that suit different preferences. For a nut-free version, trade the peanut butter or almond butter for sunflower-seed butter, this swap keeps the mixture cohesive because the nut butter helps the bars stick together. Replace chopped almonds with toasted sunflower seeds, extra rolled oats, or a handful of shredded coconut flakes. Stir through dried cranberries for a pop of sweetness and colour.
Do No Bake Granola Bars Freeze Well for Meal Prep?
Yes! These chewy granola bars freeze beautifully. Press the oat mixture into the pan, let it chill, slice into bars, and wrap each piece tightly in plastic wrap or parchment. Place the wrapped bars in a freezer-safe container, pressing them firmly into the pan to avoid air pockets, then freeze for up to two months. Thaw at room temperature for 20–30 minutes, or pop one into your lunch bag, and it will be ready by snack time, perfect if you like to toast the oats in advance and try this recipe for multiple granola bar variations.
Pair these no-bake granola bars with our easy avocado toast recipe for breakfast or a cool chocolate chia pudding, and you’ll have quick, satisfying options any time of day


